How to Make Amazing Star Wall Decor
Share1Pin193Email194 SharesInside: With just a few supplies you can transform a star used for yard art to your own DIY wall decor. Jump into this fun DIY craft project and adorn your walls with your own personality. This post contains affiliate links. Making my own wall decor A few years ago I found a rustic…
Inside: With just a few supplies you can transform a star used for yard art to your own DIY wall decor. Jump into this fun DIY craft project and adorn your walls with your own personality.
This post contains affiliate links.
Making my own wall decor
A few years ago I found a rustic tin star at a garage sale for a couple of bucks. It was cute enough on its own but I wanted to spruce it up and make my own wall decor.
With just some scrapbook paper and mod podge, I loved how it turned out so much, it was the first decor I hung up in my newly painted bedroom.
While I didn’t save before pictures of the star, I flipped it over so you can see it the material beforehand and how it looked after.
Recently while at Micheals I came across a wooden star and with my 40% coupon thought I’d try the same technique on a different medium. And the results were awesome!
How to make a star DIY wall decor
Supplies
- Wooden Star or Metal or Tin Star – either type you can find at a craft shop. Any size will work but ideally, the side of one leg of the star won’t be any bigger than your paper so you don’t have to cut and overlap your paper. My stars were between 18-24 inches in diameter.
- Mod Podge
- Glitter Mod Podge (not pictured)
- 4-6 scrapbook papers that are color coordinated. I love the colors and patterns in DCWV Glittered and Foiled, Blossoms and Butterflies. Regardless of what kind of paper you use, make sure to use heavy cardstock.
- Sandpaper
- Paintbrushes
Related: How to make a baby book scrapbook
Step – by – step instructions
1. Make a template
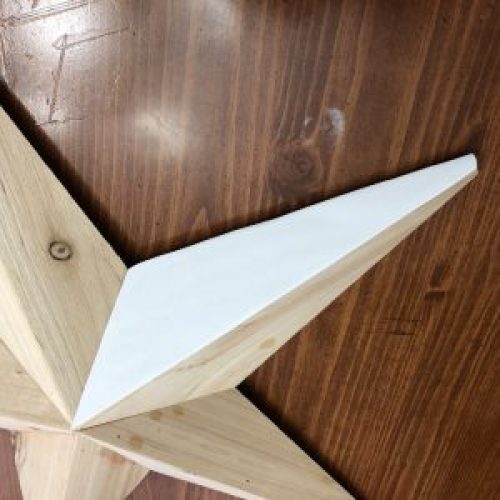
Create a template for each side of the star. I used lightweight scrapbook paper to create the template. Lay the paper along one side of the star and score all three edges. You may be tempted to lay the star down on the paper and trace it with a pencil. But this won’t work, your template won’t be big enough.
Cut your template out then make sure it covers one side of the star. Flip both sides and ensure it fully covers both sides. It can overlap, you just don’t want it to be too small.
Flip your pretty scrapbook paper upside down and begin tracing your template with a pencil and cutting it out. Make sure to flip your template upside down when tracing so you can get both sides of the star.
If that doesn’t make sense – just start with one then lay out your pieces on your star. Alternate colors and patterns. If possible, cut out extra so you can play around with the color and pattern scheme.
Related: How to make a Paper DIY Flower Bouquet
2. Glue the paper to the star
Layout the cardstock on your star in the pattern you like. Don’t worry at this point if the cardstock is a little big and overlaps.
Regardless if you have a wooden or tin star, mod podge works great for this craft.
Taking it one section at a time, paint a generous amount of mod podge on the star and the paper, then adhere the paper to the star. Press down on the corners.
Continue to work around the star on all sides. If you’ve never worked with mod podge before here are a few things to know:
-
- dries quickly
- it’s sticky but go ahead and get your fingers involved
- dries clear
- when working with it, it appears to leaves streaks but when it dries all the streaks disappear
- it’ll quickly become your favorite glue
Related: Make a DIY Quote Sign for a Loved One
Your paper will overlap on the sides, center, and hang off on the bottom sides. You may be tempted to cut this, but it won’t look good. We will sand this down in the next step.
3. Sand the star sides
Once the mod podge has completely dried, it’s time to sand down all the seams. Using the sandpaper, sand down all corners, ends, and seams until they are smooth and white.

Glitter, gloss, shine
Shake off all the dust from the sanding of the prior step. Get out a clean paintbrush and glitter mod podge.

Personalize it
Because of the bright colors and cheerful flowers of the paper, I chose to hang my newest star outside on my covered porch. This DIY wall decor would also make a fun gift – personalize it with the colors you know a loved one would enjoy.
I made a couple of college themed ones for gifts.
Just change up the scrapbook paper. I found these tin stars at Walmart for just $4!


Making this sweet star this weekend! We have SO many paper scraps to work with.